- in Uncategorized by Lara
Lara Made a Fairy Garden!

 It’s summer~ a time for flowers and dirt, water sprinklers and shady grass. I’ve got my vegetable and herb garden planted and have already enjoyed a few harvested radishes and salad greens! But there are lots of fun garden things to do that don’t involve veggies, like–Fairy Gardens!
I LOVE fairy gardens, they look so cute online and in garden shops. I tell myself every year that I’ll definitely make my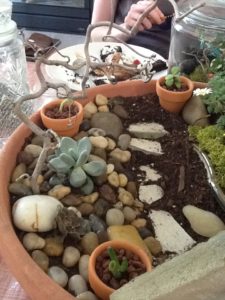 own. Finally, this year it happened! Some friends of mine also wanted to make their own fairy gardens, so we all got together, shared pots, broken ceramics, random dollar store buys, collections of stones and dead twigs, and we each made our own amazing fairy gardens!
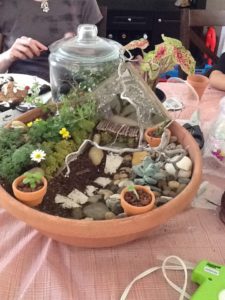
You might be able to guess which one is mine– it’s featured above, and… has the most pictures. Heh, what can I say? I am so proud of my tiny fairy garden! I worked hard to arrange each little plant–not so smart of me to put some water loving groundcover plants with dry loving succulents, but look how cute they are!
Okay, I will take them out later, I 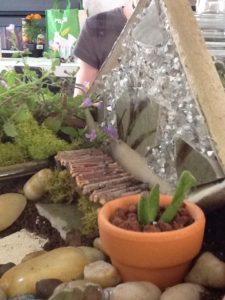 promise, I’m just waiting for my leafy, flowery plants to grow out more. Maybe I’ll make more twig furniture too. It was surprisingly easy–all you need is a glue gun, some twigs, and a pair of scissors–remember to cut AWAY from yourself–and you can make anything!
Some of my friends were a little smarter at least, making sure their plants all liked the same amount of water and sunlight, so they’d have one happy pot! And when it came 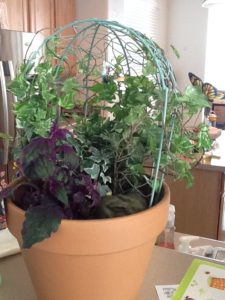 to decorating, despite having
access to all the same materials, everyone still ended up with completely different gardens to suit their own tastes!
One person got a lovely doll-size trellis to trail her ivy plant up to make a secret nook for any curious fairies.
Another created a little stone 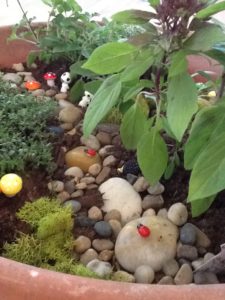 brook through her tiny garden for little tree spirits to rest by.
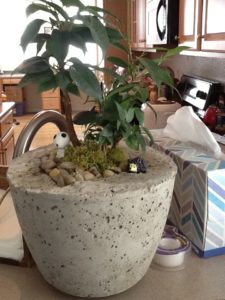
Another creative friend showed up with a homemade concrete pot, which she planted with a single tiny weeping fig. Then she surprised us more with a collection of tiny Mononoke tree spirit figures to take up residence at the base.
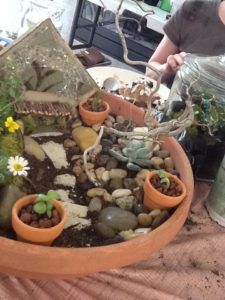
 Of course, our remarkable friend is our personal plant expert, and when she planned out her fairy garden, her main goal was nothing less than training her very own bonsai tree!
Astonishing, I know, but if anyone can do it, I’m certain it’s her!
As you can see, we had plenty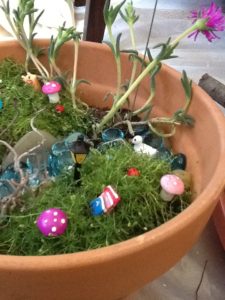 of rocks and colored pebbles to help dress up our gardens, and any tiny accessory we happened across in the dollar store turned out to be a perfect addition to the fairy feeling we wanted for this project.
A few tips I wish I’d known before starting though:
- Know what plants you’re getting!
 As I mentioned earlier, I’ll have to move my succulents to another pot eventually–maybe another fairy garden? But where they are now, while okay, isn’t ideal, because the other plants want a lot more water than the succulents can tolerate.
2. Have the right kind of soil!
Some plants–those silly succulents again– are used to much drier earth than most potting soil you’ll find is. So you might need to get special dirt for your special plant!
3. Work outside or put down a sheet!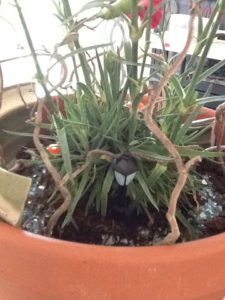
There’s lots of dirt involved in gardening, but surprisingly, fairy garden decorating can get messy too. Pebbles falling out of their bag, sand getting everywhere, bits of twig caught on clothes, and glue sticking to it all. Lucky for me, one of my friends was planning for her four year old to make a mess and prepared accordingly. Little did she know that I would be the main source of disaster she had to look out for!
Overall, this was a lot of fun, and I can’t wait to make another fairy garden–just succulents next time!